
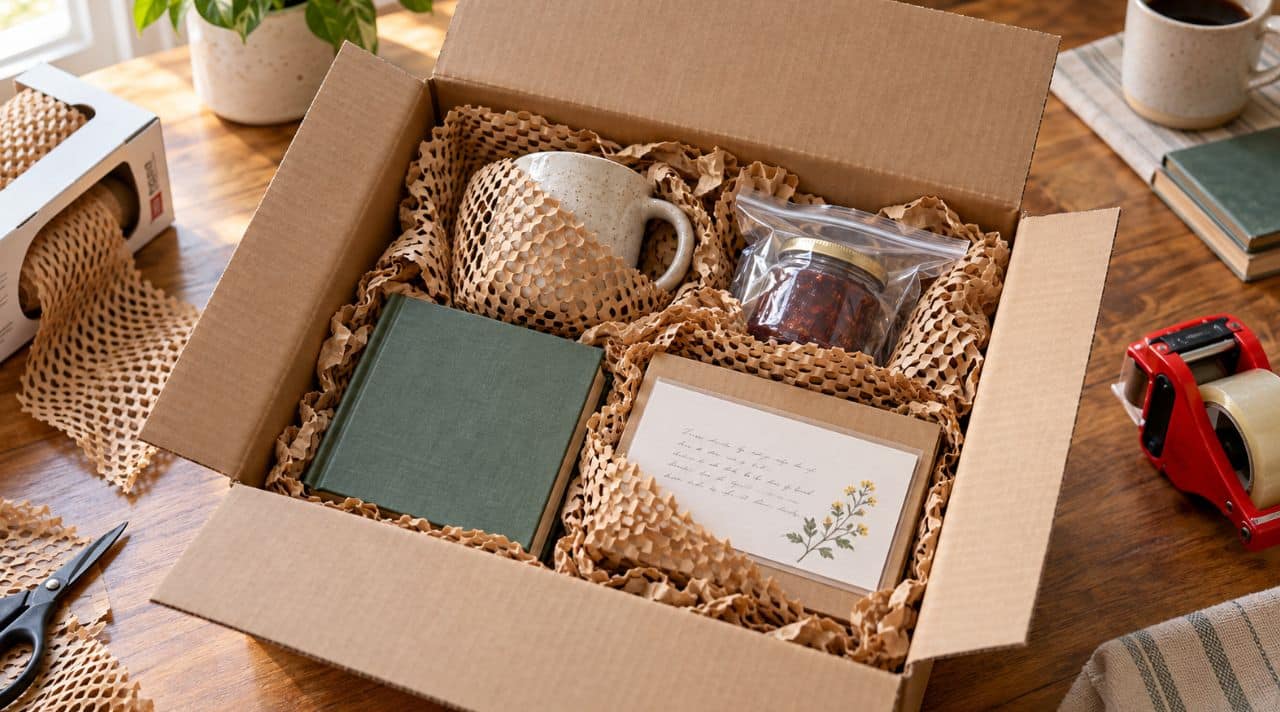

Care has a better chance of arriving intact when nothing inside can wander.
Learning how to mail a care package is less about making the box look perfect than making sure nothing inside can slide, leak, or press against the note. A jar may need two kinds of protection: one layer to contain a leak and another to soften a knock. A photograph needs the opposite treatment – it should stay flat, dry, and away from anything heavy.
If I were still deciding what belongs inside, I would settle that before buying the box; these personal care-package ideas can help separate meaningful additions from things that only fill space. The finished package should fit the person and the journey. That is one small part of finding meaningful ways to make distance feel less lonely.
Once the gifts are chosen, I use a simple test: close the flaps without taping them and gently move the box. If I can hear knocking or feel an item travel, the packing is not finished. Snug is the aim, not squeezed.
Check what can travel before wrapping anything
Before I tape a box shut, I make a quick inventory. I am looking for four kinds of trouble:
- Leak: jars, lotions, oils, sauces, or anything with a removable lid.
- Break: glass, ceramic, frames, tins with thin edges, or items with handles.
- Spoil or melt: homemade food, chocolate, candles, and temperature-sensitive products.
- Restricted: aerosols, batteries, alcohol, perfume, and other regulated contents.
I check the chosen carrier’s current rules for the exact service and destination. For U.S. mail, the USPS packaging instructions explain the basic process, while its mailing restrictions cover regulated contents. Other carriers and destinations may apply different rules.
For perishables, I think beyond the expected delivery date. The parcel may spend extra time in a truck, warehouse, or on a doorstep. Sometimes a shelf-stable substitute is kinder than a homemade treat arriving too late.
For a package going overseas, I check the destination country’s import restrictions as well as the carrier’s rules before wrapping anything.
I also look up the customs paperwork and describe the contents plainly; writing only “gift” does not tell customs officers what is inside.
Choose a box that fits and holds up
I choose a sturdy corrugated box with room for cushioning beneath, above, and around the gifts. The right box passes three simple checks:
- The wrapped gifts fit without touching the outer walls.
- There is enough room to cushion the bottom, sides, and top.
- The flaps meet naturally without being pushed down.
A box that fits only when the gifts are pressed against its walls is too tight. A much larger box takes more filler, may cost more to ship, and gives the contents more room to move.
I also check the fit with fragile objects already wrapped. A bare mug may fit beautifully until its handle has enough cushioning to survive the trip.
- crushed or punctured,
- damp or soft in places,
- split along a seam, or
- covered with old labels and barcodes that cannot be removed.
If I reuse a sound box, I remove or fully cover every old shipping label and barcode. Once sealed, the outside should show only the current delivery information.
Protect each item before it goes in the box
- Contain any permitted liquids first
Check the lid, threads, and seal, then secure the closure so it cannot work loose. Put the container in a leak-resistant bag with enough absorbent material to take up a small spill before adding the cushioning that protects it from impact. A bag may contain a leak, but it cannot make a loose lid safe or change what the carrier allows.
- Wrap breakables one by one
Wrap each fragile item separately with packing paper or bubble wrap, paying particular attention to handles, rims, and thin projections. Secure the wrapping to itself rather than taping directly onto the gift. Press lightly around the wrapped item: if a hard edge is still easy to feel, that spot needs another layer.
- Give corners extra protection
For a framed piece, book, or gift box with sharp corners, fold clean cardboard around the corners and hold it in place with paper or wrapping. No hard corner should be able to press directly against the shipping box.
- Keep letters and photographs flat
Slide them into a clean sleeve or envelope, placing plain paper between photographs that might rub. Sandwich the packet between two pieces of stiff cardboard and tape the cardboard to itself without letting adhesive touch the contents. Keep this packet above heavy gifts and away from anything that might leak.
- Separate heavy and delicate things
Place heavier items low in the box, but do not let them rest against glass, thin corners, handles, or the flat packet. Use cushioning between objects so one gift cannot become a small battering ram when the box changes direction.
A FRAGILE label may describe what is inside, but it cannot stop an item from striking the box wall. The protection still has to come from wrapping and keeping the contents from moving.

Arrange the gifts and fill every useful gap
I arrange the gifts in an order that keeps weight away from weak points:
- Lay cushioning across the bottom.
- Place heavier, sturdy gifts low and near the center.
- Keep fragile pieces away from the walls and from one another.
- Place the protected note or photographs above heavy objects and away from liquids.
- Fill the side gaps before cushioning the top.
A book can sit beneath a wrapped mug, but I would not let its edge lean against the handle. Crumpled packing paper works well in awkward gaps; air pillows or other clean cushioning can work where appropriate.
Then I check the pressure. If I have to lean on the flaps, the box is overfilled. Too much pressure can crack a container or bend the very note I was trying to protect.
Before sealing, I close the flaps and give the box a gentle shake. Knocking or sliding tells me where a gap remains. I reopen the box and add cushioning at that point – not simply wherever there is easy space near the top.
Seal and address the box
Once the contents are settled, I close the flaps without forcing them down. Then I work through the outside of the box:
- Tape: use proper packing tape, not masking tape, cellophane tape, string, or decorative paper tape.
- Address: confirm the recipient’s name, unit number, city, region, and postal code.
- Return address: check it with the same care.
- Backup: place a plain copy of both addresses inside the box.
I run packing tape along the center seam where the top flaps meet, then tape across both ends so the exposed flap edges stay closed.
The three strips form the familiar H-taping pattern. I check and reinforce the bottom seams in the same way, especially on a reused box.

For an international parcel, I include the destination country and follow the carrier’s current addressing instructions.
I put the exterior label on a broad, flat face, away from seams and corners. The writing and barcode should remain clear; before placing tape over a paper label or barcode, I check the carrier’s current directions.
Choose a service that suits the package
Before paying for postage, I compare the services using the actual box size, weight, and destination. Four questions keep the decision practical:
- How long can these particular contents safely remain in transit?
- Does the service impose extra packaging, labeling, or handling requirements?
- Does tracking matter for this gift and destination?
- What is the total cost after size, weight, distance, and speed are included?
Tracking can show whether the box is moving, but it cannot protect what is inside. A faster service may suit a tight deadline or temperature-sensitive contents; a slower one may suit a sturdy, shelf-stable package.
Either way, shipping costs can change the gift plan.
If the journey looks too long or unpredictable for the contents, I change the plan instead of hoping the packing will make up for it.
Sometimes it is kinder to let a delivery service handle the shipment near the recipient, particularly when the gift is perishable, difficult to pack, or needed quickly.
Before I hand over the box, I make one final check: are the contents allowed under the carrier’s current rules, and does anything move when I gently shake it? I press along the taped seams, confirm that the address is correct, and make sure the label lies flat with its barcode unobstructed.
I keep the receipt or tracking number where I can find it. If I tell the recipient when to expect the care package, I give the carrier’s arrival window as an estimate rather than a promise. The box may travel through hands and weather I cannot control. What I can control is whether the gifts begin that journey with enough room, enough protection, and the note still safely tucked away.